All examples
Linear

Plan a release in Linear

One 3:04 screen recording, 8 clicks, no script. TurtleScene turned it into everything below. Nothing was edited by hand.

In3:04 recording
Out19
  • 10 videos
  • 1 clickable demo
  • 2 GIFs
  • 2 thumbnails
  • 2 caption tracks
  • 1 help article
  • 1 set of launch posts
The three main outputs

Watch it, click through it, or share the story.

Script, AI voiceover, zooms and a highlight on each step, all generated from the recording. Turn the sound on.

Cut for social · 8 videos

Every shape a feed asks for.

Captions are burned in, in big phrases, so they play muted. The narrated video gets vertical and square cuts that follow every click under a step header, and a 30-second highlight in landscape and 9:16. The story video is laid out again for each shape: vertical and square cuts, and its highlight in landscape and 9:16.

Vertical cut
Reels, Shorts, TikTok · 1:19
Square cut
LinkedIn and X · 1:19
30-second highlight
Emails and landing pages · 0:33
Vertical highlight
Stories and ads · 0:33
Written from the same recording

The docs and the launch copy come with it.

Help article

How to plan a release in Linear

Use this walkthrough to create a release project, connect issues to it, and track progress as work starts. You'll also post a project update so the latest status stays visible on the project page.

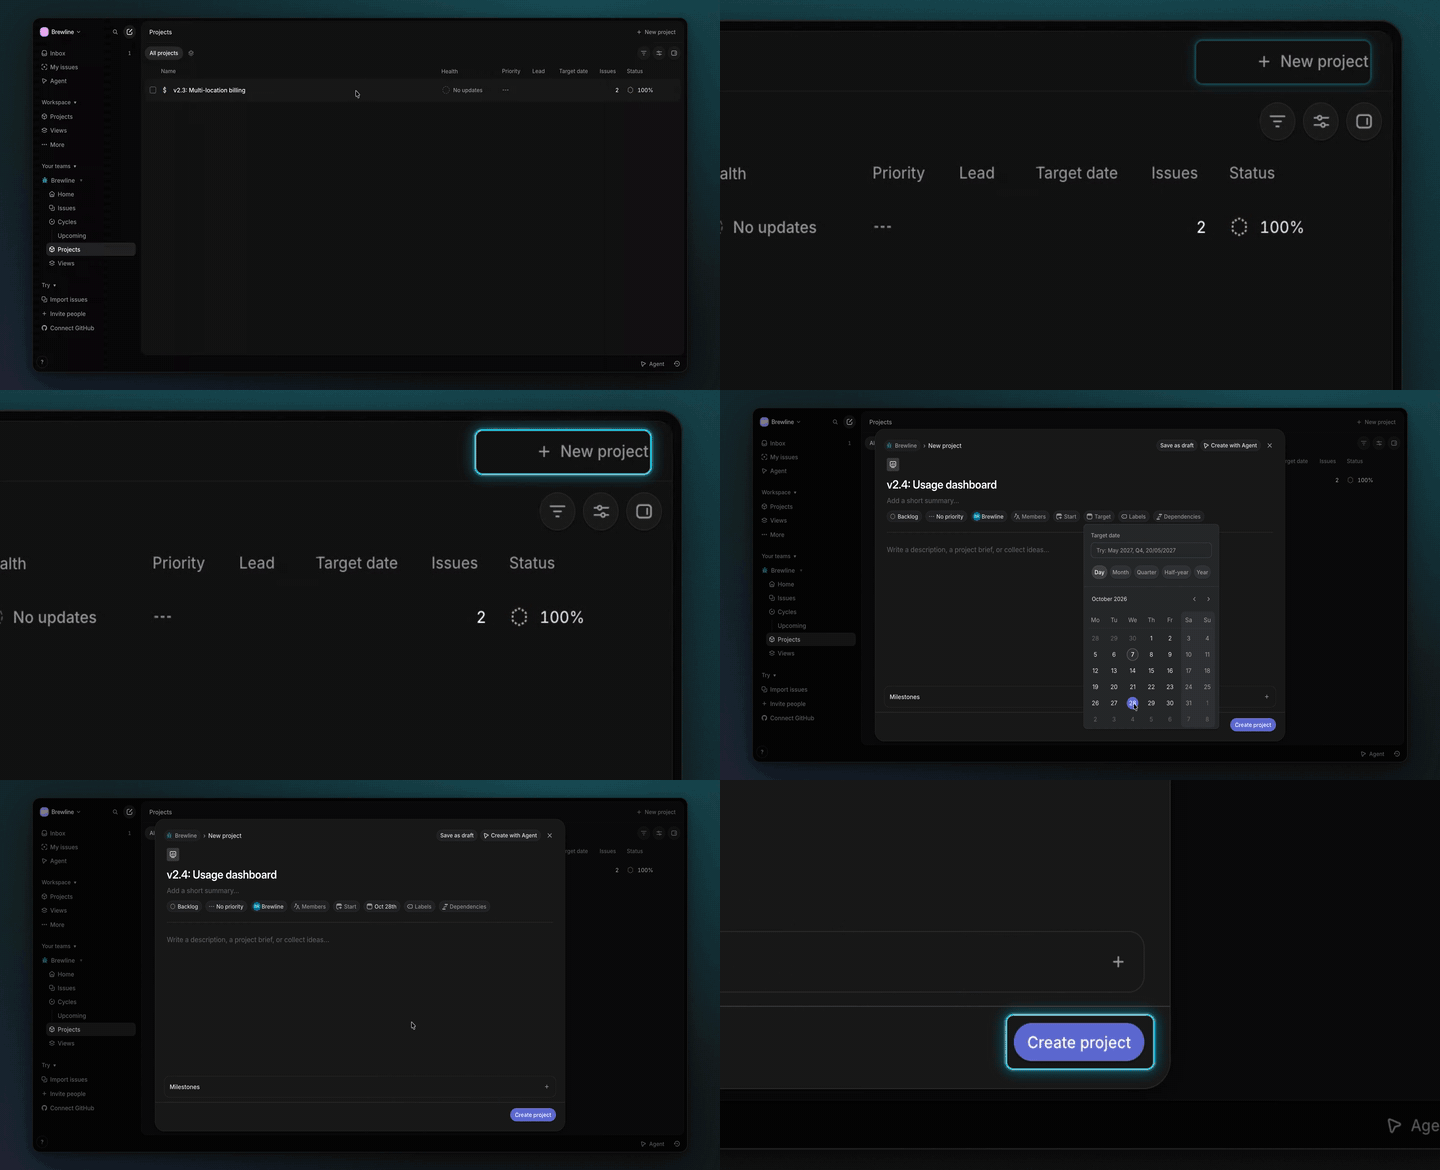
1. Create a new project
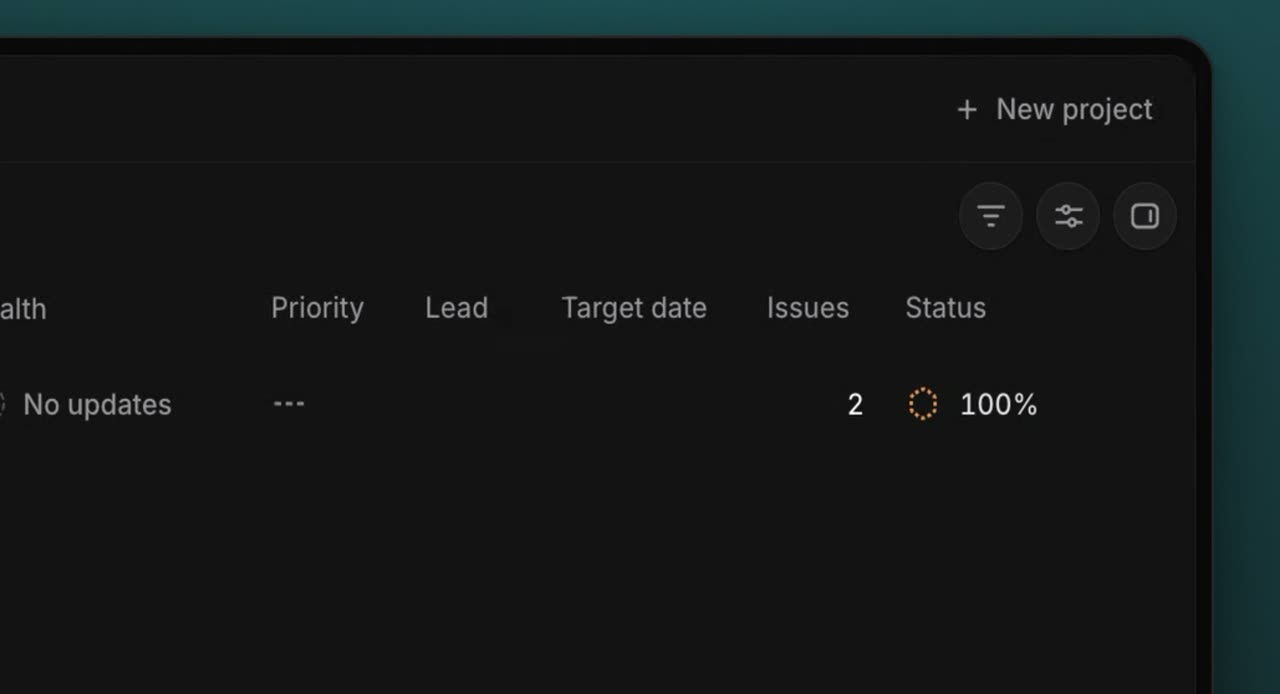
Create a new project

From the Projects page, click New project in the top right corner. This opens the project creation modal.

2. Assign a project lead
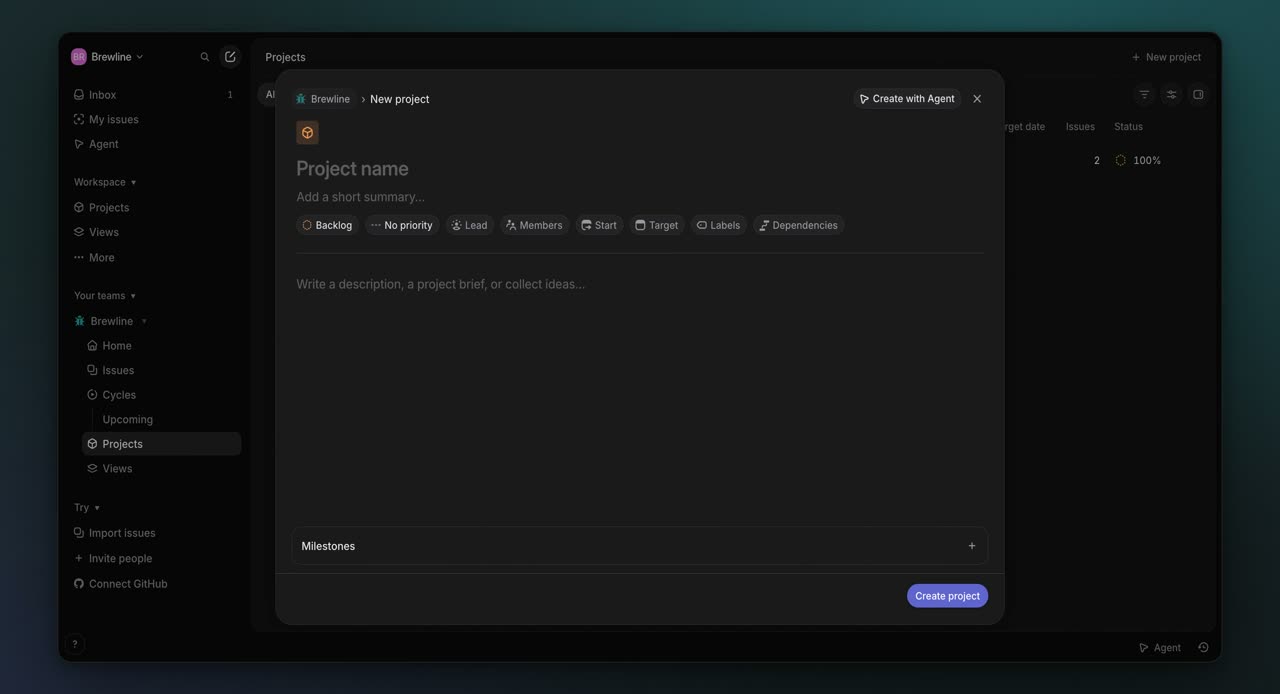
Assign a project lead

In the new project form for v2.4: Usage dashboard, open the Lead field. Select the owner for this release project.

3. Set a target date
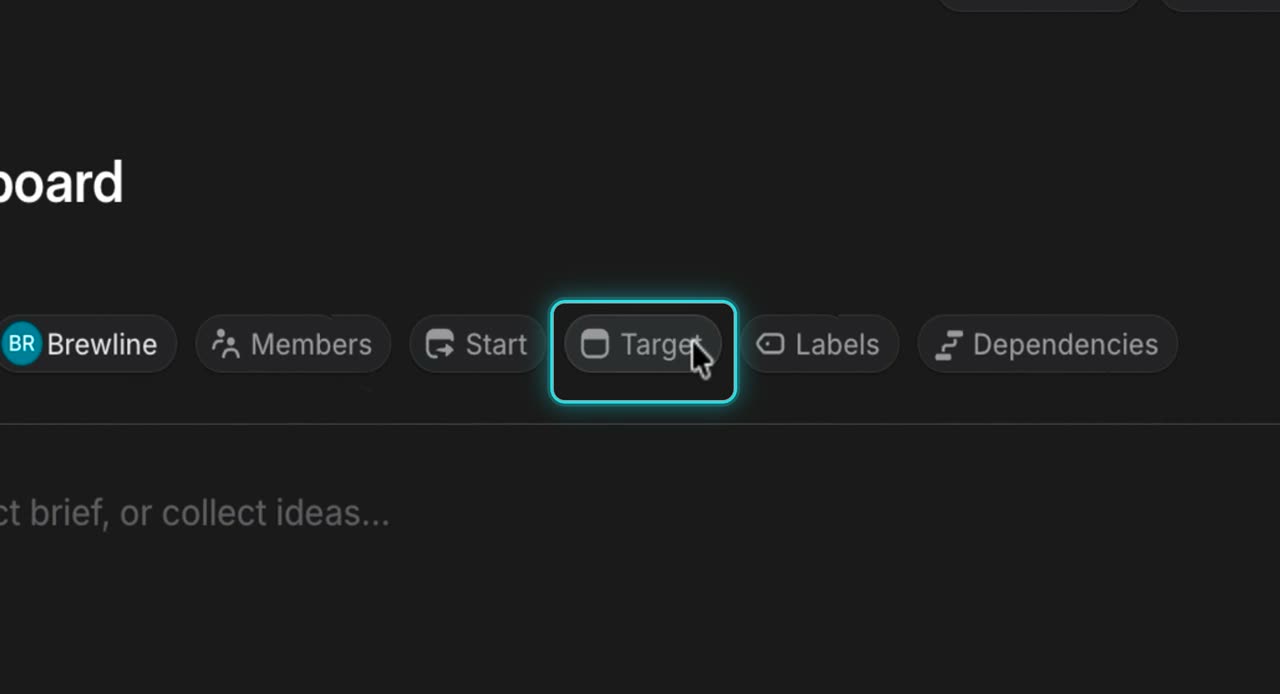
Set a target date

Click Target in the project form. Then choose the planned completion date from the calendar picker.

4. Save the project
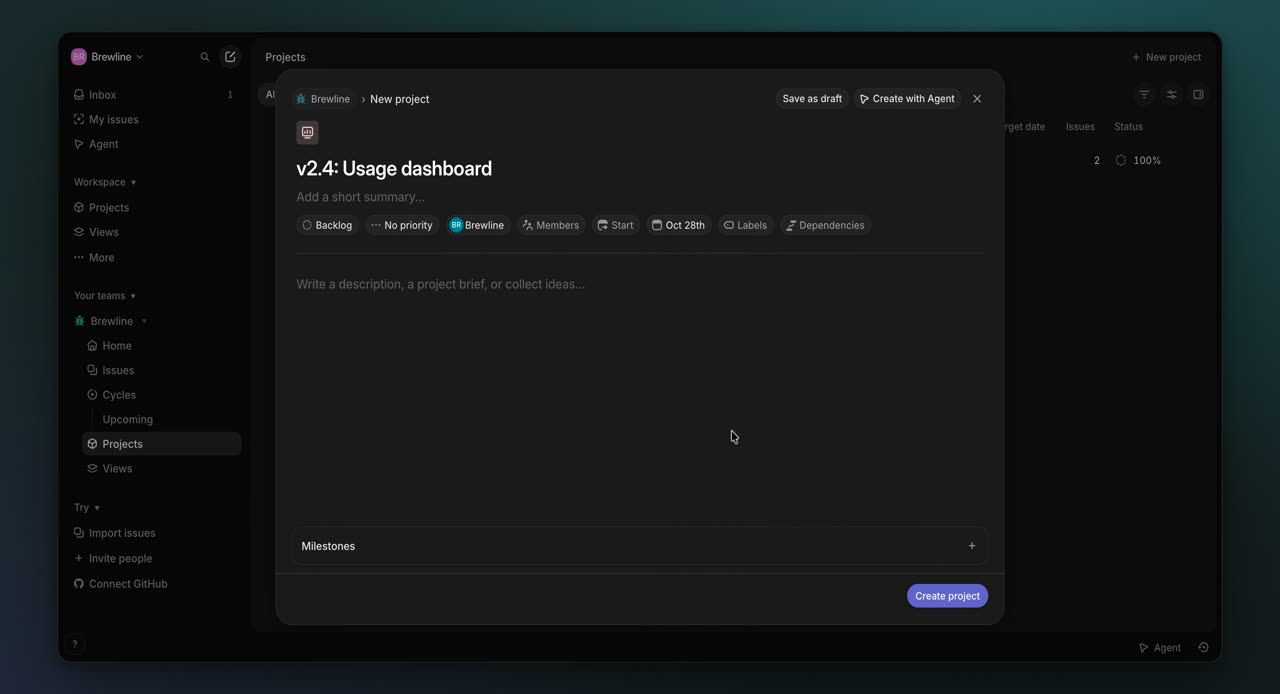
Save the project

After you fill in the lead, target date, and description for v2.4: Usage dashboard, click Create project. The project is added to your Projects list.

5. Open batch actions
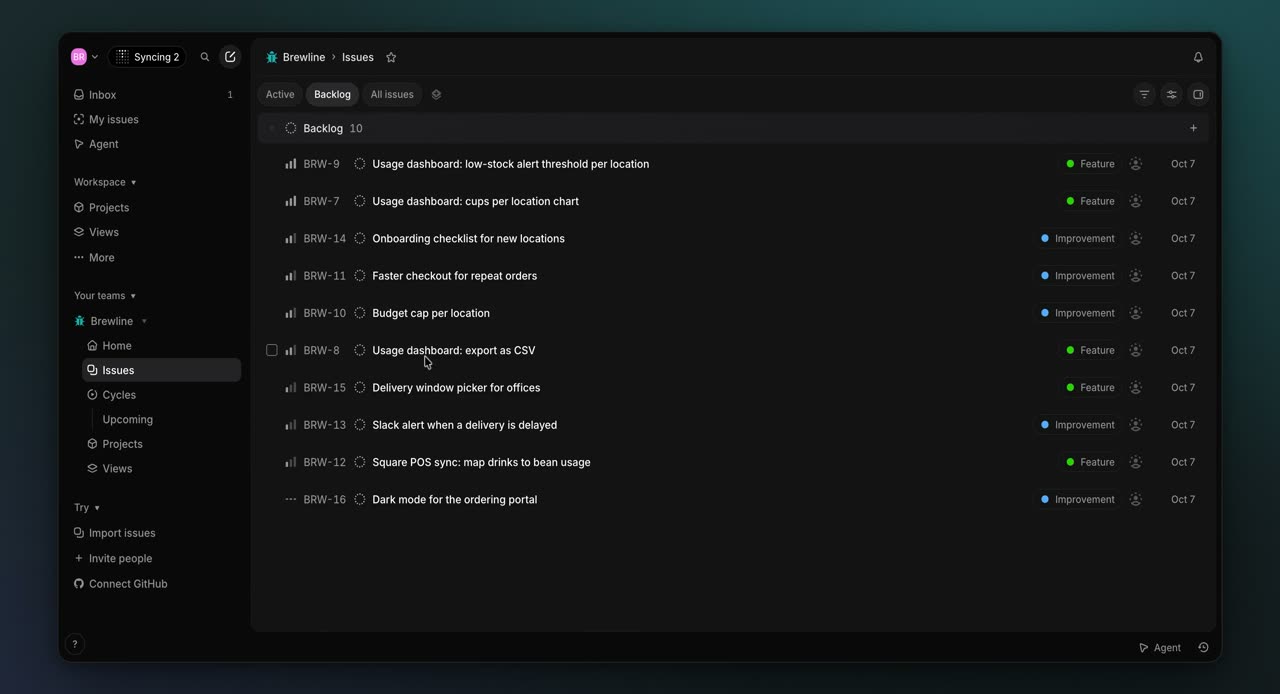
Open batch actions

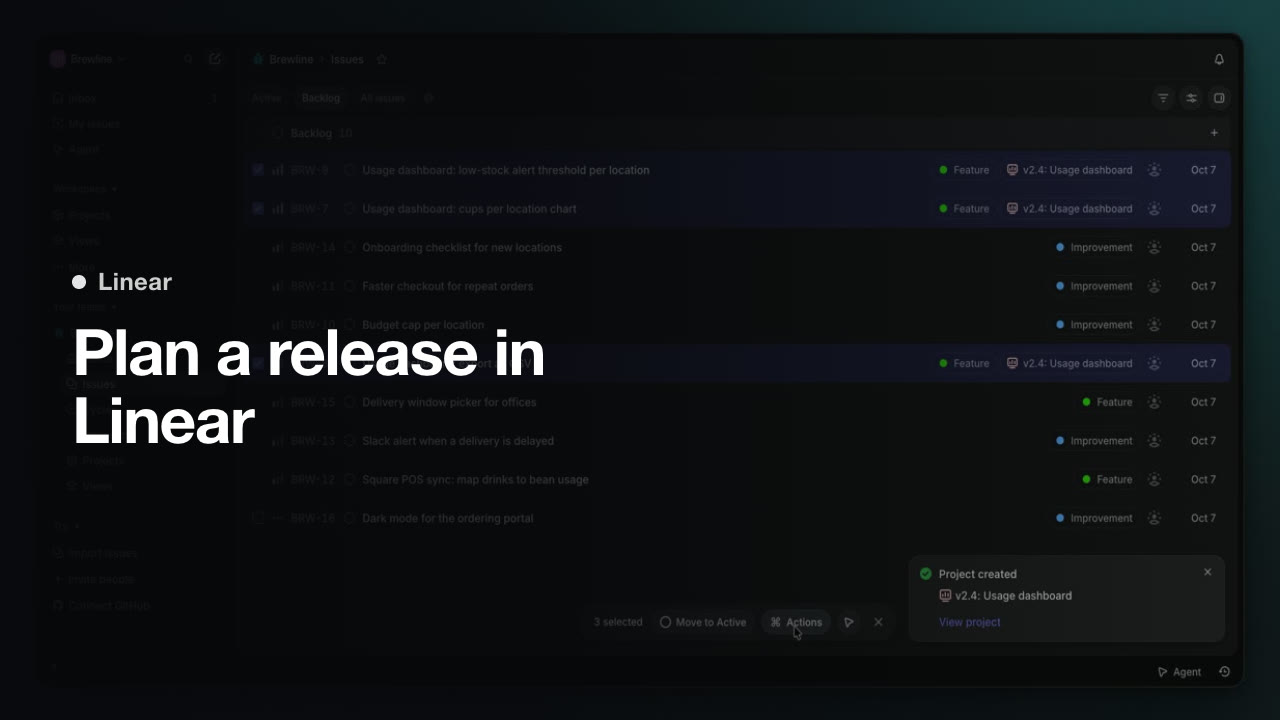
Go to the Issues list. With the three issues already selected in the bottom bar, click Actions to open the bulk update menu.

6. Add the issues to the project
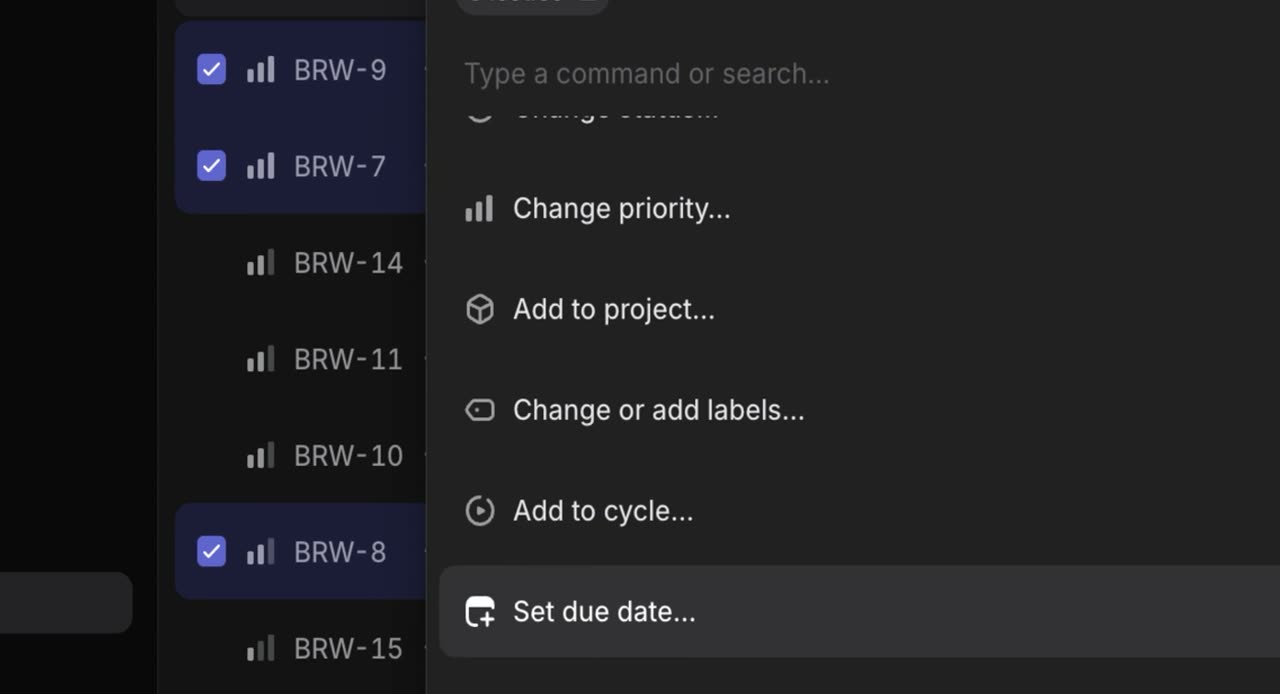
Add the issues to the project

Choose Add to project from the bulk actions menu. Then select v2.4: Usage dashboard as the project for the selected issues.

7. Move an issue to In Progress
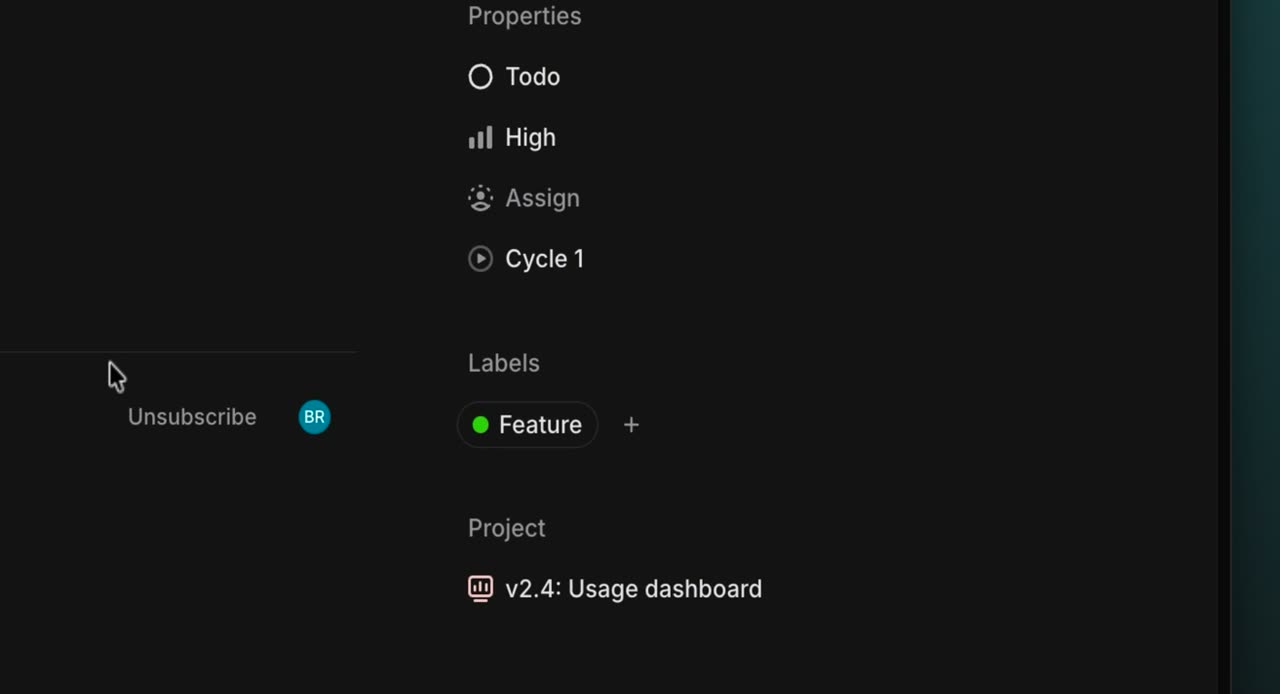
Move an issue to In Progress

On the project page, use the issue menu for a selected item to change its status from Todo to In Progress. The project view updates to show issues grouped under In Progress and Todo.

8. Post a project update
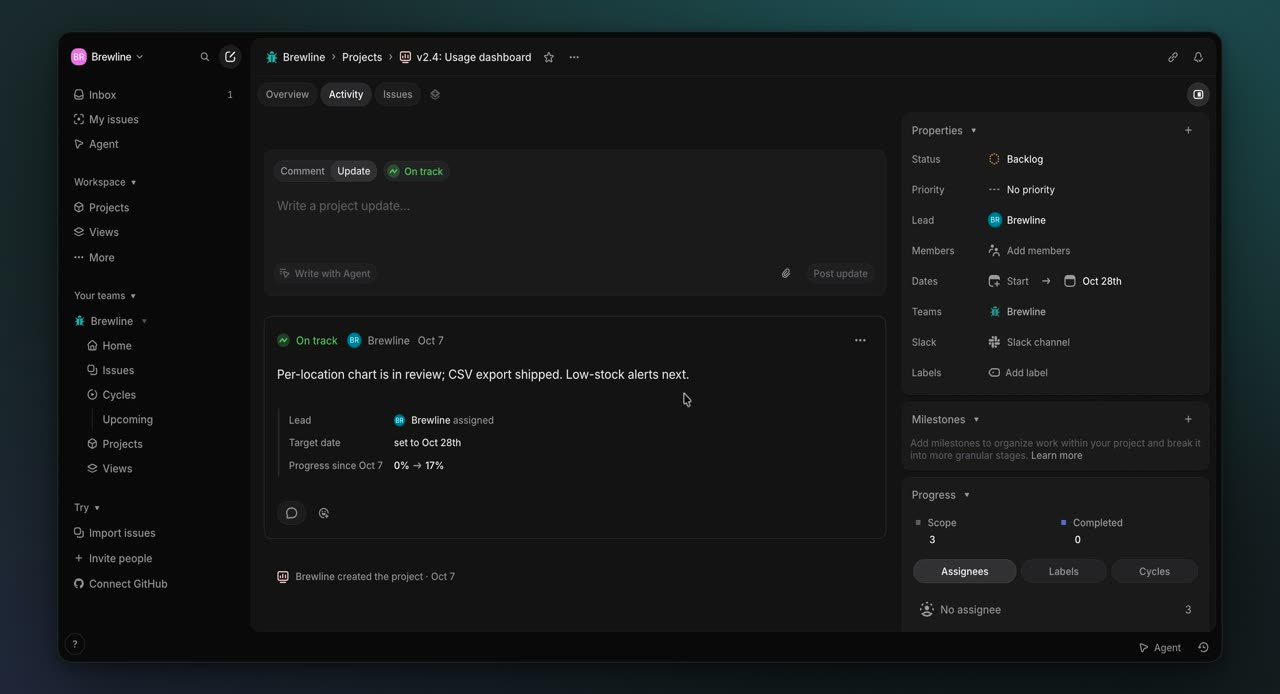
Post a project update

Back on the v2.4: Usage dashboard project page, use Update from the latest update card to publish a status report. The newest update remains visible on the project overview.

Your release project is now set up, linked to issues, and updated with a visible status report.
Launch posts
You
Your company
LinkedIn post · written by TurtleScene

Release planning breaks down fast when work is scattered across a backlog with no clear owner and no target date.

This walkthrough shows a simple way to plan a release in Linear, from an empty project to a status update your team can actually use.

It covers how to:

• create a new project for the release • name it, assign a lead, and set a target date • pull backlog issues into the project from the Actions menu • move work into In Progress as execution starts • post a project update so lead, target date, and progress are visible together

The value is straightforward: one release, one owner, one visible deadline, and a shared view of where things stand.

If you're using Linear for the first time and want a practical way to turn backlog work into a release plan, this video walks through the exact steps.

Watch the video to see how to create a project, gather the issues, and share updates in Linear. #Linear #ProductOps #ProjectManagement

You
Your company
X post · written by TurtleScene

Release plans slip when backlog work has no owner and no date.

This video shows how to plan a release in Linear: create a project, add issues, move work to In Progress, and share a status update. Watch the walkthrough. #Linear #ProjectManagement

Read the blog post

How to plan a release in Linear

Turn backlog work into a release plan

Planning a release gets harder when work is spread across a backlog with no clear owner and no visible deadline. This video walks through a simple way to structure that work in Linear, starting from an empty project and ending with a status update the team can share.

For first-time users, the flow is straightforward: create a project for the release, connect the relevant issues, and use project updates to show progress.

Start with a project

The first step is to create a new project. In the walkthrough, the release is named, a lead is assigned, and a target date is set before the project is created.

That setup matters because it gives the release a clear owner and a visible deadline from the start. Instead of treating the release as a loose collection of tasks, it becomes a defined piece of work with accountability built in.

Gather the issues

Once the project exists, the next step is to pull in the work from the backlog. The video shows how to select the relevant issues, open the Actions menu, and add them to the project.

As execution begins, issues can be moved to In Progress. That makes it easier to see which work is still waiting, which work has started, and how the release is taking shape over time.

Share where things stand

The final step is to post a project update. In the walkthrough, the update includes the project context people need at a glance: the lead, the target date, and the current progress.

That gives everyone a shared view of status without forcing them to piece it together from individual issues in the backlog.

What this walkthrough shows

This how-to keeps release planning focused on a few practical steps: create a project, gather the issues, and share updates. If you are new to Linear and want a simple way to organize a release from backlog to status update, watch the video and follow the process step by step.

Captions · narrated video
  1. 00:00Here's how to plan a release in Linear.
  2. 00:04From the Projects page, open the project
  3. 00:06creation modal with New project.
  4. 00:10In the new project form
  5. 00:12for v2.4: Usage dashboard,
  6. 00:14assign an owner for this release
  7. 00:16by opening the Lead field.
  8. 00:19Set a planned completion date from Target.
  9. 00:24With the lead, target date,
  10. 00:25and description filled in for v2.4:
  11. 00:28Usage dashboard, finish setup and add it
  12. 00:30to Projects with Create project.
  13. 00:35On the Issues list, with three issues
  14. 00:38already selected at the bottom bar,
  15. 00:40open the bulk action menu so these items
  16. 00:42can be updated together through Actions.
  17. 00:45Choose the new release project
  18. 00:48for these selected issues
  19. 00:50by picking v2.4: Usage dashboard.
  20. 00:53The project page opens and an issue
  21. 00:55menu appears for a selected item.
  22. 00:58For this issue, change the workflow state
  23. 01:01from Todo to In Progress.
  24. 01:03The project view updates to show issues
  25. 01:06grouped under In Progress and Todo.
  26. 01:10Back on the v2.4: Usage dashboard
  27. 01:12project page, publish a status report
  28. 01:15from the latest update card using Update.
  29. 01:19The latest update stays visible
  30. 01:21on the project overview.
  31. 01:24The release project is set up
  32. 01:26with issues and a posted update.
Captions · story video
  1. 00:00Here's how to plan a release in Linear,
  2. 00:02from empty project to status update.
  3. 00:06Releases slip when work sits loose
  4. 00:08in a backlog, with no owner and no date.
  5. 00:12Start with New project. Name the release,
  6. 00:15assign a lead, set a target date,
  7. 00:17then create the project.
  8. 00:21Now the release has one owner
  9. 00:23and one visible deadline.
  10. 00:25Select the backlog issues,
  11. 00:27open the Actions menu, and add them
  12. 00:30to the project. As work starts,
  13. 00:32move an issue to In Progress.
  14. 00:35Finally, post a project update. Lead,
  15. 00:38target date and progress appear with it,
  16. 00:40so everyone sees where things stand.
  17. 00:44Create a project, gather the issues, share
  18. 00:47updates. That's a release plan in Linear.
For previews and link cards

GIFs and thumbnails, from both videos.

GIF · narrated video
GIF · narrated videoChangelogs, READMEs, emails
GIF · story video
GIF · story videoChangelogs, READMEs, emails
Thumbnail · narrated video
Thumbnail · narrated videoYouTube and link previews
Thumbnail · story video
Thumbnail · story videoYouTube and link previews

Independent tutorials we recorded ourselves. Linear is a trademark of their owners; TurtleScene is not affiliated with or endorsed by them.

Your next product demo is one recording away

Record a flow on the free plan and watch it come back narrated, clickable and on-brand in a few minutes.

  • No credit card
  • 2 free recordings a month
  • Cancel any time